Build
Build your architecture as code (IaC) using Terraform.
In this activity you will:
- Use AWS environment variables
- Create an SSH key-pair
- Create the Terraform variables
- Initialize the AWS Terraform provider
- Deploy the lab infrastucture plan
- Confirm firewall bootstrap completion
You are now ready to deploy the lab infrastructure.
Create AWS environment variables
We will be deploying the lab infrastucture in AWS using Terraform. A predefined Terraform plan is provided that will initialize the AWS provider and call modules responsible for instantiating the network, compute, and storage resources needed.
In order for Terraform to do this it will need to authenticate to AWS using your AWS Access key ID and AWS Secret Key. Use the credentials downloaded in your csv file. ( see the doc here. ):
Warning
Hard-coding credentials into any Terraform configuration is not recommended, and risks secret leakage should this file ever be committed to a public version control system (like github). Rather than write these as Terraform variables, we will use Linux environment variables. Static credentials can be provided by adding an access_key and secret_key in-line in the AWS provider block, but this is not safe
Working on a private project with no public sources you could add the following snippet to a .tf file:
provider "aws" {
  region     = "us-east-1"
  access_key = "my-access-key"
  secret_key = "my-secret-key"
}
Instead create environment variables, you can provide your credentials via the AWS_ACCESS_KEY_ID and AWS_SECRET_ACCESS_KEY environment variables, representing your AWS Access Key and AWS Secret Key, respectively. Type the following commands in the terminal:
export AWS_ACCESS_KEY_ID=your-access-key-here
export AWS_SECRET_ACCESS_KEY=your-secret-key-here
Note
Note that setting your AWS credentials using either these (or legacy) environment variables will override the use of AWS_SHARED_CREDENTIALS_FILE and AWS_PROFILE. The AWS_DEFAULT_REGION and AWS_SESSION_TOKEN environment variables are also used, if applicable.
Create an SSH key-pair
All AWS EC2 instances are required to have an SSH key-pair defined when the instance is created. This is done to ensure secure access to the instance will be available once it is created.
Create an SSH key-pair with an empty passphrase and save them in the ~/.ssh
directory.
ssh-keygen -t rsa -b 4096 -N '' -f ~/.ssh/lab_ssh_key
Create the Terraform variables
Change into the AWS deployment directory.
cd ~/utd-automation/journey/deployment/aws
In this directory you will find the three main files associated with a
Terraform plan: main.tf, variables.tf, and outputs.tf. View the
contents of these files in your text editor to see what they contain and how they’re structured. Launch VS Code from the console:
code main.tf variables.tf outputs.tf
# or
subl main.tf variables.tf outputs.tf
The file main.tf defines the providers that will be used and the resources
that will be created (more on that shortly). Since it is poor practice to hard
code values into the plan, the file variables.tf will be used to declare
the variables that will be used in the plan (but not necessarily their values).
The outputs.tf file will define the values to display that result from
applying the plan.
Create a file called terraform.tfvars in the current directory that
contains the following variables and their values. Fill in the quotes with the
AWS region name, the AWS availability zone, and the path to your SSH public key
file.
code terraform.tfvars
# or
subl terraform.tfvars
Copy and paste the following snippet in your new file. Change the values for the Region and Availability Zone. You can find more information about Region and AZ in the AWS User Guide. And more information on Palo Alto Networks solutions on TechDocs.
aws_region_name     = "YOUR-REGION"
aws_az_name         = "YOUR AZ"
public_key_file     = "~/.ssh/lab_ssh_key.pub"
Warning
Do not forget to save your changes to create the new file: File > Save or CTRL + S.
You can find the available AZ for a region by typing the following command from the terminal (AWS Cli is required):
aws ec2 describe-availability-zones --region region-name
For example, for the United States - North Virginia (1st AWS Region and AZ):
aws_region_name     = "us-east-1"
aws_az_name         = "us-east-1a"
public_key_file     = "~/.ssh/lab_ssh_key.pub"
Note
On your Virtual Machine, a .gitignore file has been added at the root of your home path ~/ preventing the synchronisation of files like .tfvars. You can remove files from the git process by adding the filename or the extension to the .gitignore: vim ~/.gitignore
Initialize the AWS Terraform provider
Once you’ve created the terraform.tfvars file and populated it with the
variables and values you are now ready to initialize the Terraform providers.
For this initial deployment we will only be using the
AWS Provider.
This initialization process will download all the software, modules, and
plugins needed for working in a particular environment.
terraform init
Deploy the lab infrastucture plan
We are now ready to deploy our lab infrastructure plan. We should first perform a dry-run of the deployment process and validate the contents of the plan files and module dependencies.
terraform plan
If there are no errors and the plan output looks good, let’s go ahead and perform the deployment.
terraform apply -auto-approve
At a high level these are each of the steps this plan will perform:
- Run the
bootstrapmodule - Create an S3 bucket for the firewall bootstrap package
- Assign an IAM policy to the bucket allowing read access from the firewall instance
- Create the
/config/init-cfg.txt,/config/bootstrap.xml,/software,/content, and/licenseobjects in the bootstrap bucket
- Run the
- Run the
vpcmodule - Create the VPC
- Create the Internet gateway
- Create the
management,untrust,web, anddatabasesubnets - Create the security groups for each subnet
- Create the default route for the
webanddatabasesubnets
- Run the
- Run the
firewallmodule - Create the VM-Series firewall instance
- Create the VM-Series firewall interfaces
- Create the Elastic IPs for the
managementanduntrustinterfaces - Create an IAM instance profile for accessing the bootstrap bucket
- Run the
- Run the
webmodule - Create the web server instance
- Create the web server interface
- Run the
- Run the
databasemodule - Create the database server instance
- Create the database server interface
- Run the
The deployment process should finish in a few minutes and you will be presented with the public IP addresses of the VM-Series firewall management and untrust interfaces. However, the VM-Series firewall can take up to ten minutes to complete the initial bootstrap process.
It is recommended that you skip ahead and read the ../03-run/terraform/background-terraform section while you wait.
Verify on AWS Console some elements created by terraform
You can log in to the AWS Console using your utd-console IAM profile. Confirm that the 3 EC2 instances have been created by Terraform:
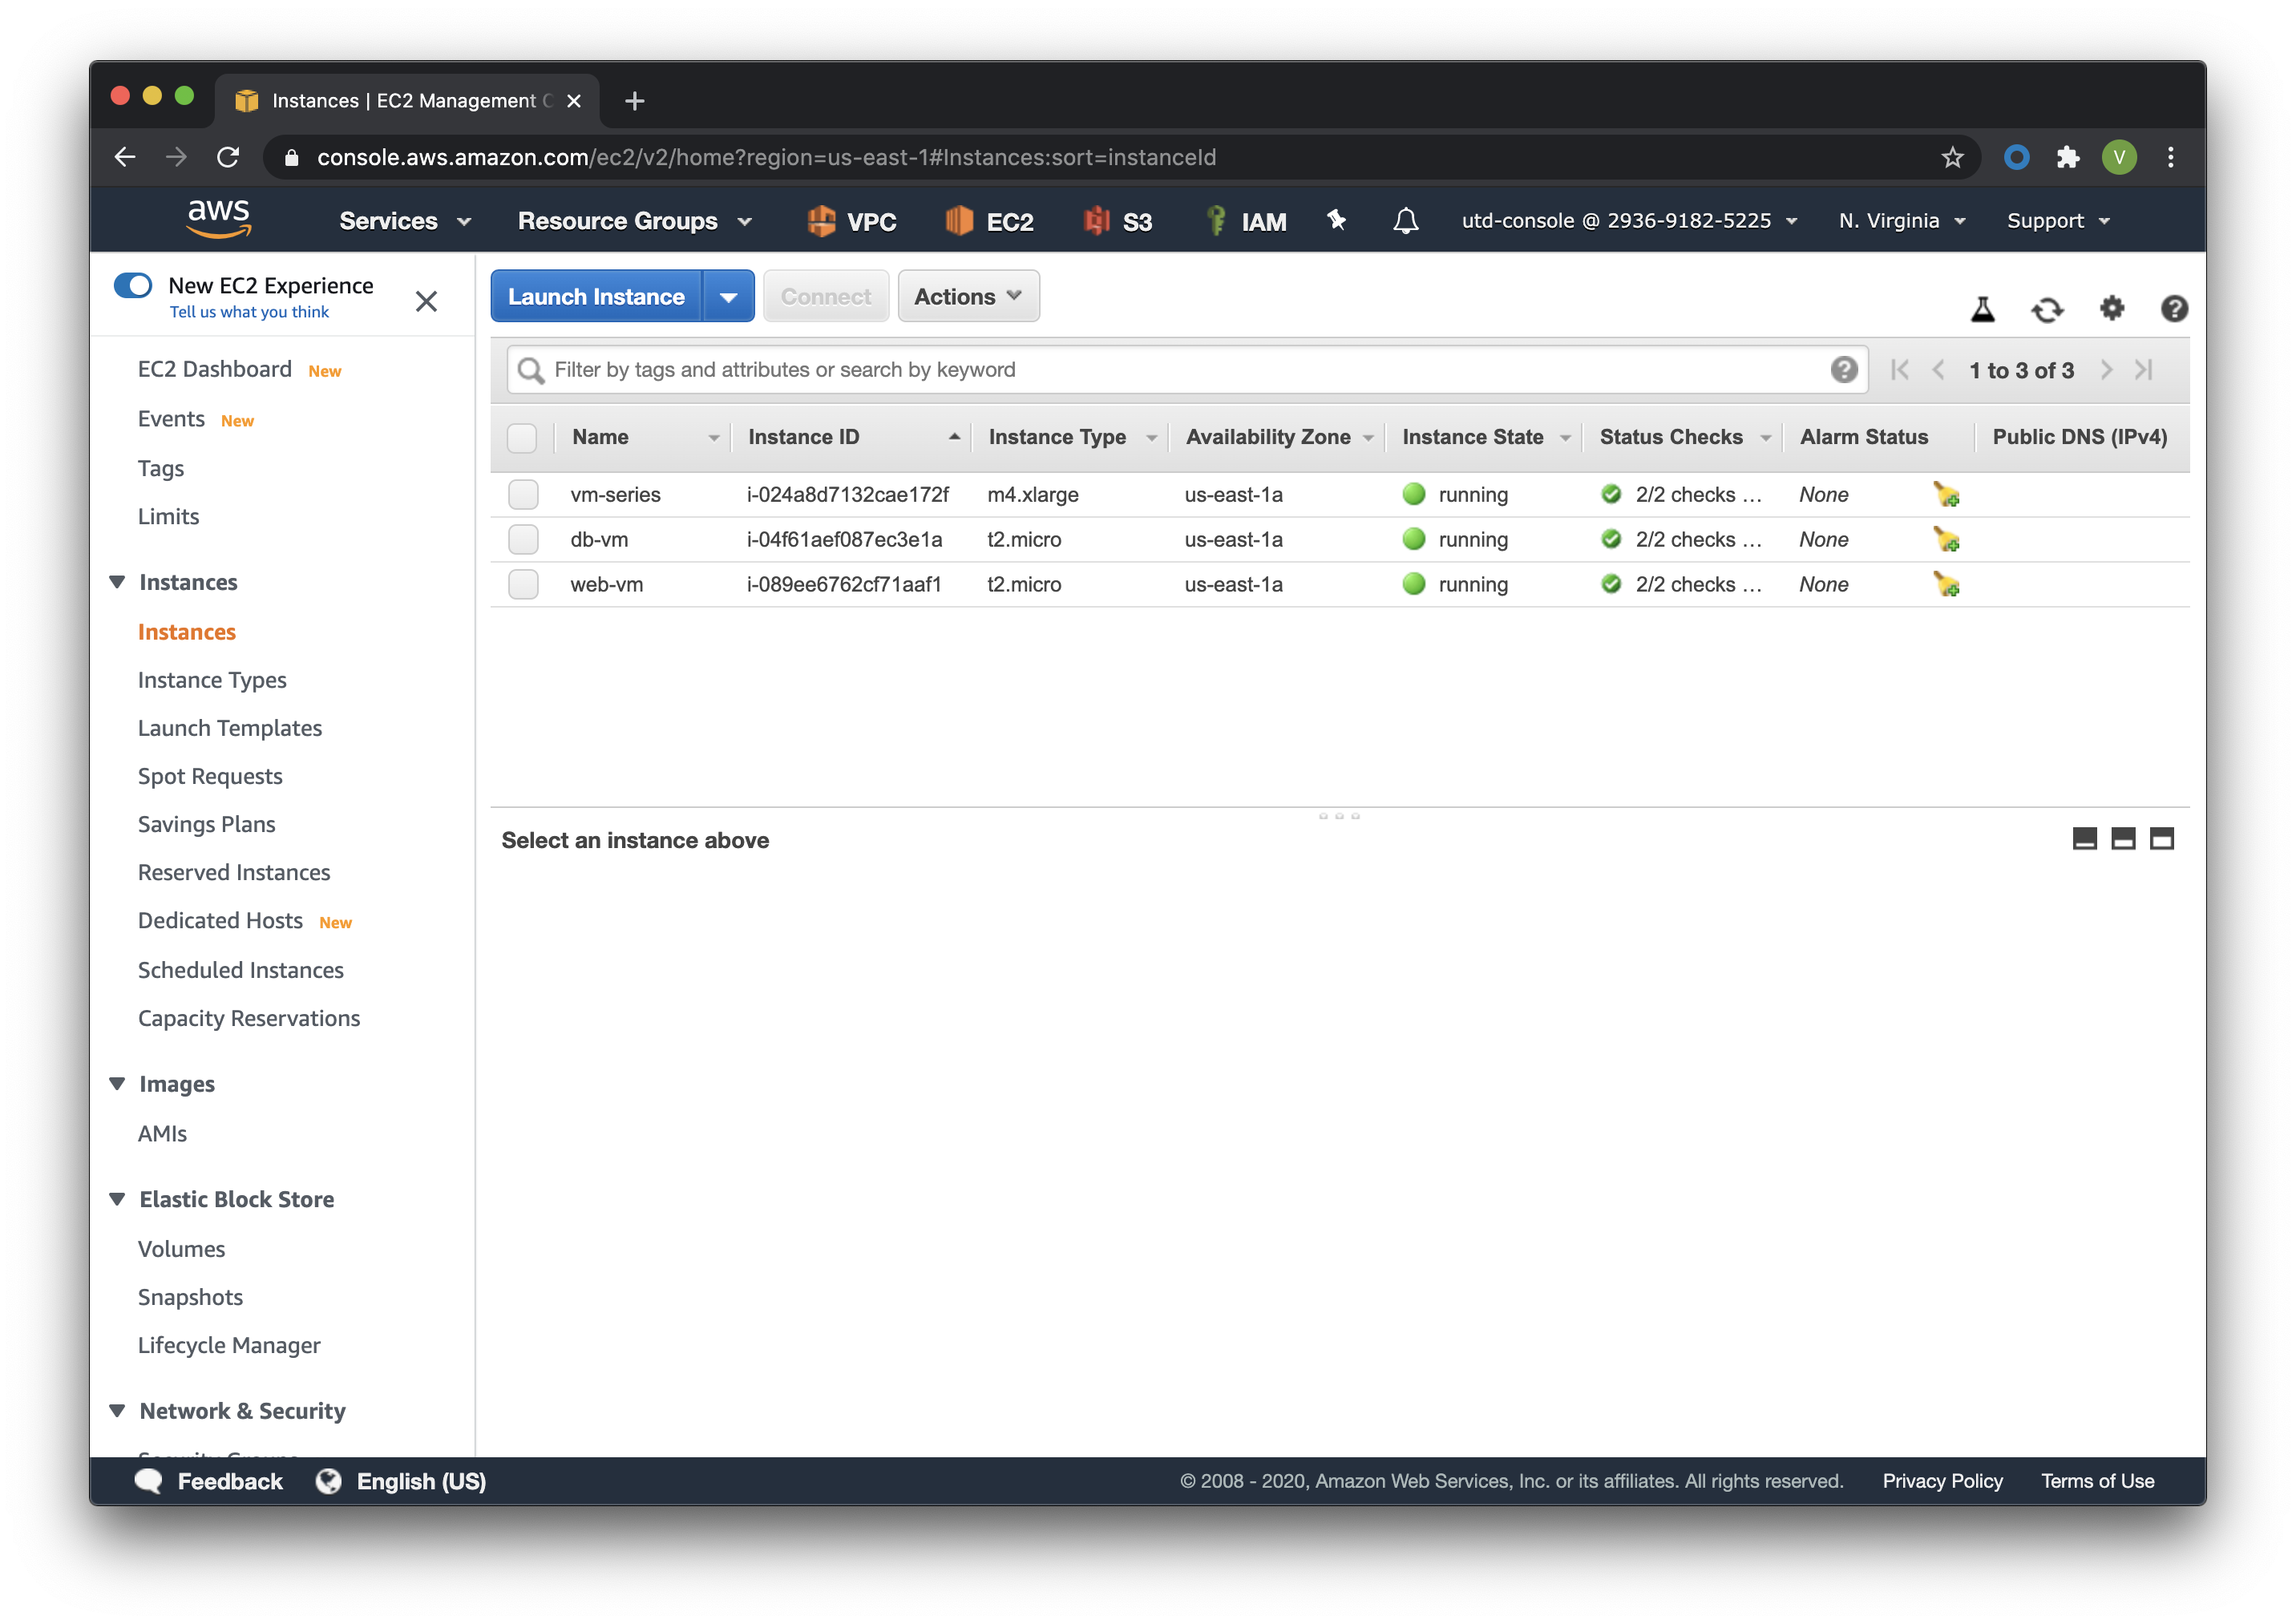
Note
The firewall will take between 5 to 10 minutes to be operational. To boot using the bootstrap file and auto-commiting the configuration.
You deployed your infrastructure sucessfully, you can now proceed to the configuration.